
TLDR
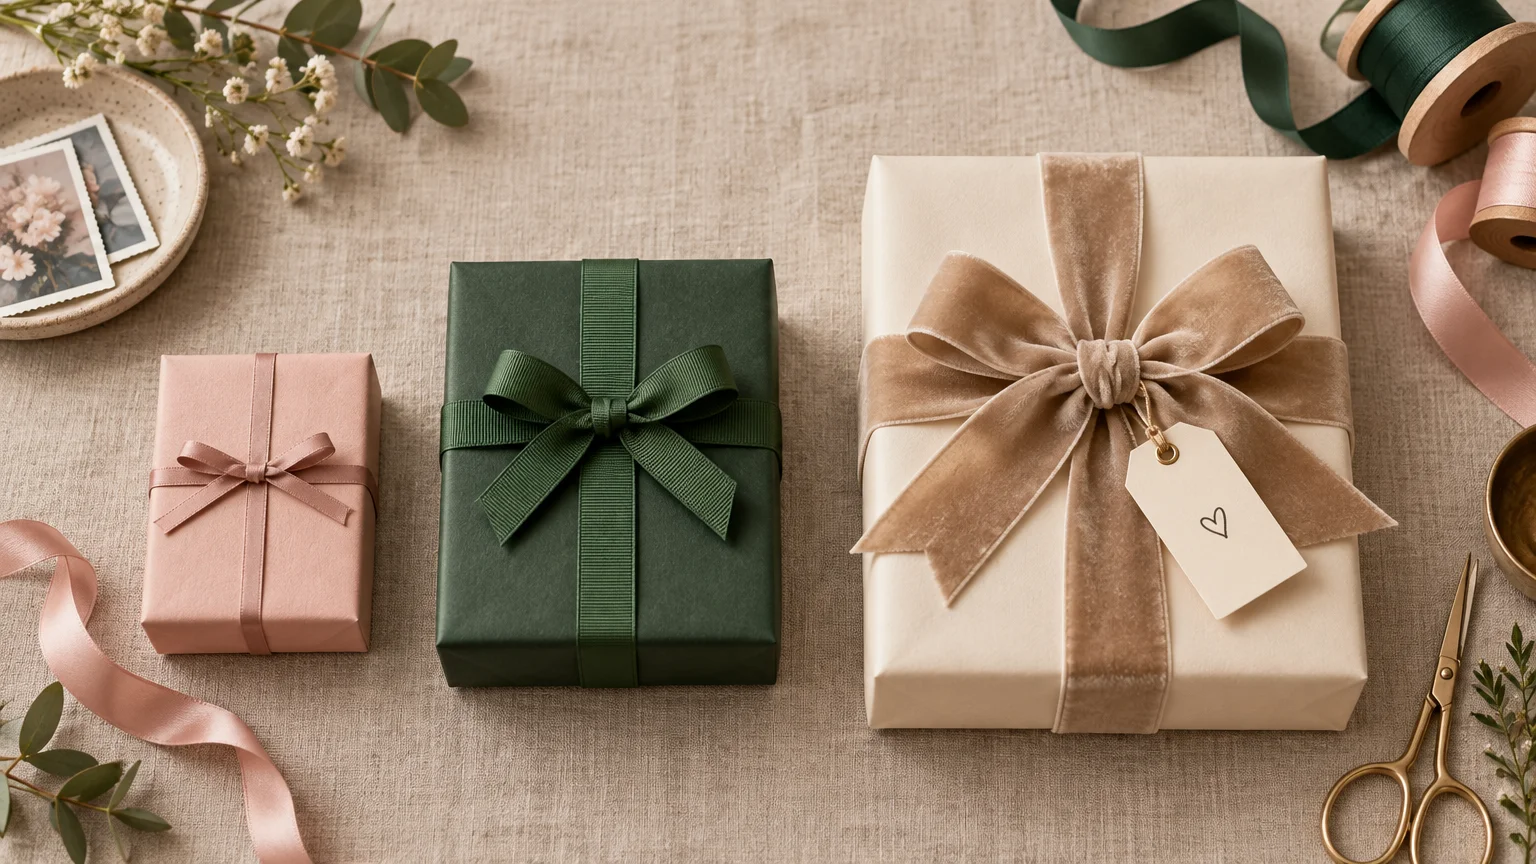
For a reliable ribbon width gift box pairing, start with 1/4–1/2 inch ribbon for tiny favor or jewelry boxes, 3/4–1 inch ribbon for most everyday gift boxes, and 1 1/4–2 inch ribbon for large boxes, hampers, or dramatic bows. These are starting points, not strict rules: the box depth, ribbon material, and planned bow all affect what looks balanced.
If you want one versatile spool, choose 1-inch or 25-mm ribbon. It has enough presence for a medium shirt, book, or keepsake box without overwhelming most packages. Move narrower for petite boxes and wider when the package or bow needs more visual weight.
Ribbon width gift box chart
Choose ribbon according to the visible scale of the wrapped box, not the size or value of the item inside. Tokyo Ribbon’s wrapping guidance suggests approximately 6–12 mm ribbon for small gifts, 18–25 mm for common boxes around 20–30 cm, and 30 mm or wider for larger gifts. Treat those measurements as a practical baseline and then adjust for your bow. Tokyo Ribbon’s gift-wrapping guide also recommends wired ribbon when a large bow needs more structure.
| Gift box situation | Starting ribbon width | Why it works | Simple presentation idea |
|---|---|---|---|
| Tiny favor, ring, or jewelry box | 1/4–1/2 inch (6–12 mm) | Adds definition without hiding the box | Use a narrow cross-wrap with a small knot or two-loop bow |
| Small candle, mug, or compact keepsake box | 1/2–3/4 inch (12–18 mm) | Feels noticeable but still suits a petite package | Tie a flat bow and tuck a small tag under the knot |
| Medium book, shirt, or standard gift box | 3/4–1 inch (18–25 mm) | Creates balanced coverage on an everyday box | Choose a classic cross-wrap and two-loop bow |
| Large box or shallow hamper | 1 1/4–1 1/2 inches (30–38 mm) | Provides enough visual weight for a broad lid | Use one wide band or a structured bow |
| Oversized package or statement presentation | 1 1/2–2 inches (38–50 mm) | Keeps the ribbon from disappearing against the package | Choose wired ribbon for a shaped multi-loop bow |
Common conversions are approximately 1/4 inch to 6 mm, 1 inch to 25 mm, 1 1/2 inches to 38 mm, and 2 inches to 50 mm. That makes it easier to compare ribbon listed in metric and imperial measurements.
Let the bow influence the width
Two boxes of the same size may need different ribbon widths because the bow changes the visual balance. A flat band with a simple knot can look elegant in a relatively narrow ribbon. A full bow occupies more space, so it can support greater width without appearing heavy.
Flat knot or single band
This is the quietest option and works especially well on small boxes. Use the lower end of the suggested width range. You can wrap the ribbon once around the box, secure it on the underside, and place a tag or seal where the ends meet. It creates a tidy focal point without adding a bulky bow.
Classic two-loop bow
For most medium boxes, 3/4-inch or 1-inch ribbon gives the loops enough body while remaining easy to tie. Keep the loops proportional to the lid rather than making them as large as the ribbon allows. A bow that covers roughly the central portion of the lid will usually look more intentional than one stretching to every edge.
Layered ribbons
Two narrow ribbons can replace one wide ribbon when you want color or texture without a heavy band. Try a 1/2-inch base ribbon with a 1/4-inch contrasting ribbon centered over it. Tie them together for a lively double-color bow, or use the narrow layer only as a flat accent.
Layering works best when each ribbon has a clear role. One might echo the wrapping paper while the other picks up a color from the card or gift tag. Avoid adding multiple patterns, metallic cords, charms, and oversized tags all at once; the effect can quickly shift from personal to crowded.
Wide statement bow
A large box, holiday hamper, or important milestone gift can carry a 1 1/2-inch or 2-inch ribbon. Wired edges help loops hold a deliberate shape, making them useful for larger sculptural bows. A wide ribbon tied into a small, restrained bow can also work; width does not require enormous loops.
Choose a material that supports the presentation
Width is only part of the decision. Ribbon with a firm weave maintains a more defined shape, while a softer ribbon falls into relaxed loops. Ribbon guides commonly distinguish structured choices such as grosgrain and wired ribbon from softer-draping satin, sheer, and chiffon styles. This ribbon material and width guide provides a useful overview of those distinctions.
- Satin creates a smooth, celebratory finish for birthdays, anniversaries, weddings, and polished thank-you gifts.
- Grosgrain adds visible texture and makes a crisp, casual bow. It is a useful counterpoint to smooth paper or a plain box.
- Sheer ribbon keeps favors and small event gifts looking light. Choose a little more width than you would with an opaque ribbon if it seems to disappear against the box.
- Velvet brings visual warmth to winter gifts and keepsake boxes. Because it already has strong texture, a simple knot can be enough.
- Wired ribbon is the practical choice for large loops, layered bows, and arrangements that need to retain a shaped silhouette.
Material can also change how wide a ribbon appears. A dark, opaque velvet band will usually command more attention than a translucent ribbon of the same measured width. Place a short length across the lid before cutting; this quick visual check is more useful than treating any width chart as an absolute rule.
How much ribbon do you need for a cross-wrap?
For a traditional cross-wrap that runs around the box in both directions, begin with this estimate: 2 × length + 2 × width + 4 × height + bow allowance. Measure the actual wrapped box rather than relying on the package label, particularly if folded paper or a decorative sleeve changes its dimensions.
For a box measuring 10 × 8 × 4 inches, the wrap around the box uses an estimated 52 inches before the bow: (2 × 10) + (2 × 8) + (4 × 4) = 52 inches. You then need to add enough ribbon for the knot, loops, and tails.
There is no universal bow allowance because a compact knot and a multi-loop bow consume very different amounts. For the first package, leave the ribbon attached to the spool while you loosely form the cross-wrap and bow. If that is inconvenient, cut the first length generously, make a test tie, and record the finished measurement before wrapping matching gifts. Trim the tails only after you are happy with the bow.
How to correct a ribbon that looks wrong
If a ribbon overwhelms the lid, first simplify the bow rather than immediately abandoning the spool. A wide ribbon can become a flat belly band, a short folded accent, or a small knot with angled tails. You can also turn the box so the ribbon crosses its longer dimension, giving the band more space around it.
If the ribbon looks too thin, layer two strands, add a contrasting narrow cord, or place a modest tag beneath the bow. On a large box, moving from a wispy two-loop bow to a cluster of structured loops can also give narrow ribbon more presence. The goal is not to fill every open area; it is to make the ribbon look deliberate against the scale of the lid.
Add one personal finishing detail
Once the ribbon is working, choose one focal detail: a name tag, monogram, short message, photo seal, or small enclosure card. Position it near the central knot or slightly beneath the bow so the eye has one clear place to land.
For a coordinated presentation, repeat one color, motif, or type style across the wrapping and card. The guide to creating a matching gift, card, and sticker set explains how to carry that visual idea through without making every element identical.
A round name seal can hold tissue closed, secure a flat ribbon band, or personalize an otherwise plain box. If you need a made-to-order option, explore custom packaging seals in a size and shape that leave enough room for the recipient’s name to remain readable. Keep the design concise: initials, a short phrase, or one small illustration will usually complement the ribbon better than a crowded message.
A quick wrapping checklist
- Measure the finished box and identify whether it is tiny, medium, large, or oversized.
- Choose a starting width based on the box scale: 1/4–1/2 inch, 3/4–1 inch, or 1 1/4–2 inches.
- Decide whether you want a flat knot, classic bow, layered ribbons, or a structured statement bow.
- Place a sample across the lid to judge its actual visual weight and opacity.
- Estimate the cross-wrap length, then add a separate allowance for your chosen bow.
- Test the knot or bow before making the final cut.
- Add one focal detail, such as a tag, seal, or short message card.
- Trim the tails and rotate the box to check the presentation from every side.
The practical takeaway
When you are unsure, begin with 1-inch ribbon on a medium gift box. Scale down to 1/4–1/2 inch for petite boxes and up to 1 1/4–2 inches for large packages or statement bows. Then let the ribbon material and bow shape fine-tune the result.
The most thoughtful presentation is rarely the one with the most decoration. A balanced ribbon, a neatly tied bow, and one personal detail can make an ordinary box feel chosen specifically for its recipient—and that feeling starts before the gift is even opened.